
Turning a copied picture into a named JPG in Clip
Save as JPG on Clip by Zaweba's History page turns any picture in your clipboard history into a named file, using the same folder and quality as Quick clip.
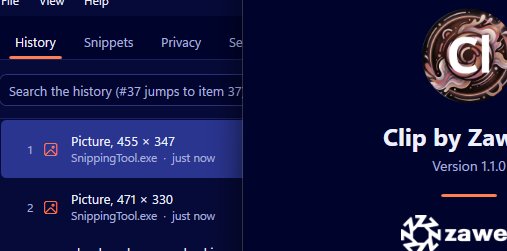
You copy a picture from a web page, a chat or a document, and later realise you want it as a file. Normally that means opening an image editor, pasting, and saving. In Clip by Zaweba, the picture is already in your history, and Save as JPG on the History page turns it into a properly named file directly.
Where to find it
Open the main window from the tray menu with Open Clip and go to the History page. Pictures appear in the list alongside text, and the preview shows the selected one. Choose the picture you want and use Save as JPG.
You're asked for a name, just as with Quick clip. The file name is built from the name you give, in lower-case words joined by hyphens, and saved into the same folder Quick clip uses, Pictures\Clips unless you've changed it. It uses the same JPG quality too, 85 by default.
Why it matches Quick clip
Quick clip, started with Ctrl+Alt+C, is for snipping a fresh area of the screen and naming it on the spot. Save as JPG is for pictures you've already copied. Because they share the same naming, folder and quality, you get one tidy collection of named images however they arrived. A folder of how-to screenshots can mix snips taken with Quick clip and pictures saved from your history, and it all looks consistent.
The same rule about clashes applies too: an existing file is never overwritten, and a repeated name gets a number added on the end.
Finding the picture first
If your history is long, search makes this quicker. The History page has search, and in the popup, typing the word picture filters the list to pictures. Clip notes the program each item came from, so adding the program's name to your search narrows things further.
If you know you'll want a picture later, pin it when you copy it. Pins stay at the top and are never removed by the history limits, which matters for pictures because Clip caps them by total size, 100 MB by default, and the oldest unpinned items go first.
Good uses
Saving a product photo someone sent in a chat so you can attach it to an order. Keeping a diagram copied from a document for a presentation. Turning a screenshot taken with another tool into a named file without opening an editor. Rescuing a picture you copied hours ago and need now as a file to upload.
In each case the job takes a few seconds: find the picture, Save as JPG, say or type a name, done.
Things to bear in mind
JPG doesn't keep transparency, so any see-through parts of a picture become white when saved. For photos and screenshots that's rarely an issue; for a logo with a transparent background, it's worth knowing.
Pictures only appear in the history if picture recording is on. It can be switched off in Settings, so if you're not seeing pictures, check there. Very large single copies, over 32 MB, are ignored by default.
And if the picture is something you'd rather not keep, deleting it from the History page after saving it as a file keeps your history tidy.
It's a small button, but it means that copying a picture is now enough to keep it.

