
A Mac colour picker that needs no screen recording permission
On a Mac, Colour by Zaweba uses macOS's own colour sampler, so it can pick colours from the screen without asking for Screen Recording permission.
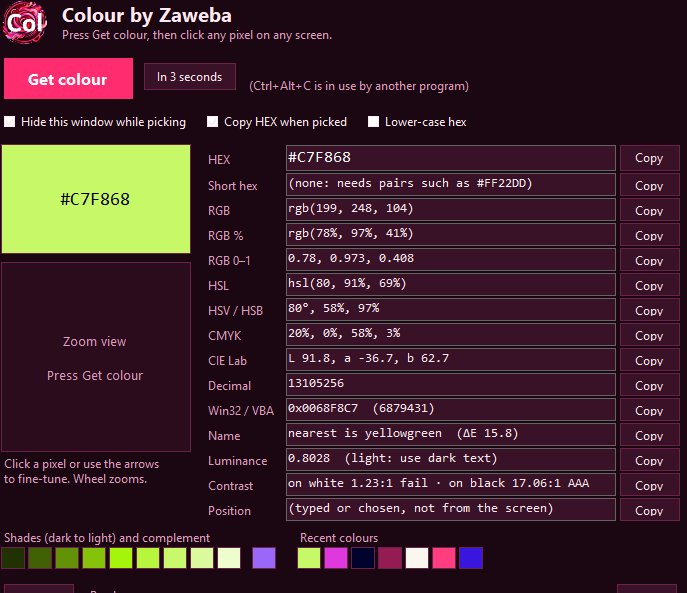
On a Mac, Colour by Zaweba picks colours with macOS's own colour sampler. Because the sampler belongs to the system, the app never needs Screen Recording permission. You get the same layout and the same list of values as the Windows version, from hex to CIE Lab.
If you have ever been put off a picker by a prompt asking to record your screen, that is the reason this one works differently.
Why other pickers ask for screen recording
To read the colour of a pixel, a program normally has to look at what is on the screen. On recent versions of macOS, looking at the screen counts as recording it, so the system asks you to grant permission in its privacy settings. That is a sensible protection, but it is an odd thing to approve just to find out the hex code of a button, and in some workplaces you may not be allowed to approve it at all.
macOS has a built-in colour sampler of its own, the magnifying loupe you may have seen in the system colour panel. It already has the right to read the screen. Colour hands the job of picking to that sampler and takes the result, so no extra permission is involved.
Picking a colour on a Mac
Open Colour and press Get colour. The system sampler appears and follows the pointer. Click the pixel you want and Colour fills in every format: HEX, short hex, RGB, RGB percent, RGB 0 to 1, HSL, HSV, CMYK, CIE Lab, decimal and the Win32 COLORREF. Each row has its own Copy button, and Copy all puts the whole set on the clipboard.
You can also skip picking and type a colour. The HEX box accepts a hex code, short hex, an rgb() value, three numbers separated by commas, a 0x number or a CSS colour name; press Enter and everything updates.
What is different from Windows
Because the picking is done by macOS rather than by Colour, one feature behaves differently. On Windows and on Linux X11, Colour freezes the screen and lets you fine-tune a pick afterwards in a zoom view of the surrounding pixels. On a Mac the zoom view cannot move the pick, so take a little care to land on the pixel you want first time. Aim for a flat area of colour rather than an edge, where pixels blend with their neighbours.
Everything after the pick is the same. You still get the nearest of the 148 CSS colour names with a delta E figure that says how close it is, the WCAG relative luminance and contrast ratios against white and black, a row of shades from 10 to 90 percent lightness, the complementary colour and your last 12 colours.
A sensible choice for a work Mac
Avoiding a permission prompt is not only about convenience. Fewer apps with screen access means fewer things to audit. Colour also makes no network connections at all, on any platform, so the colours you sample from client work never leave the machine. There is no account to make.
If you work on a Mac at the office and a Windows PC at home, or the other way round, the two versions are laid out alike. The values, the order they appear in and the copy buttons are where you expect them, which makes moving between the two painless.

