
How to make all your tracks play at the same volume
Loud and quiet tracks are the most common problem in a home mix. Mix by Zaweba evens them out with auto-gain loudness matching, and here is how to use it.
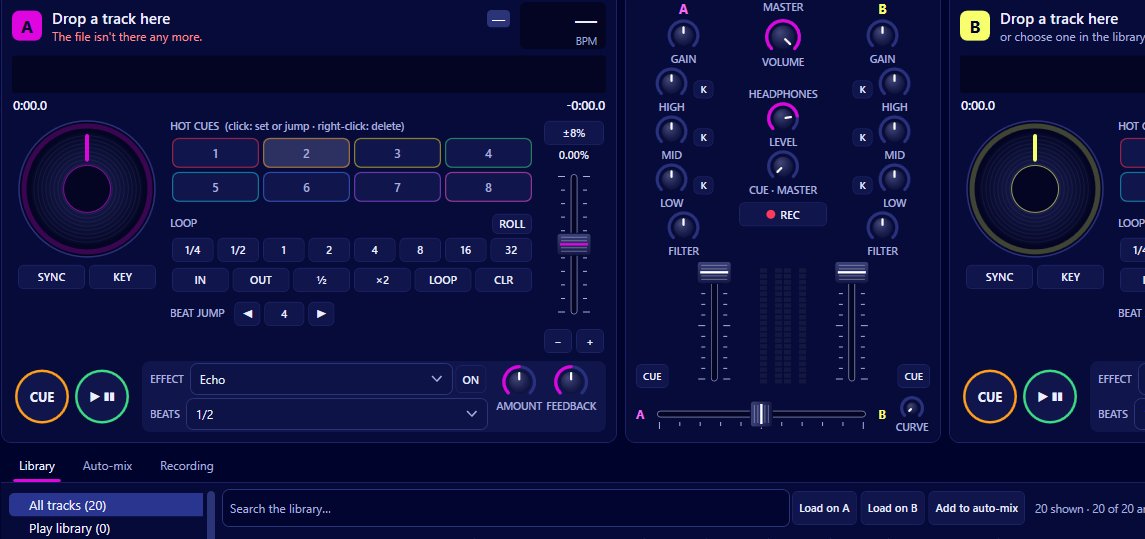
Turn on auto-gain in Mix by Zaweba and every track you load plays at the same loudness. Mix measures each track's loudness to the EBU R128 standard and adjusts its level to a target, which is set to -12 LUFS by default. Auto-gain is on unless you have switched it off, and its settings live on the Mixing page of Preferences.
Without something like this, a quiet old recording followed by a modern, heavily mastered track will jump out of the speakers, and you'd spend the night riding the faders. Auto-gain does that levelling before you touch anything.
How the measurement works
Loudness is not the same as peak level. A track can peak at full scale and still sound quieter than another, because how loud something sounds depends on how much energy it carries over time. EBU R128 is a broadcast standard that measures that perceived loudness, in units called LUFS. Mix works it out during its background analysis, alongside tempo, key, energy and the waveform overview, and caches the result, so the level is ready the moment a track lands on a deck.
If a track has not been analysed yet, Library > Analyse everything now forces the analysis, and you can turn on analysing the whole library in Preferences. Tracks loaded on a deck are analysed from the audio already decoded, so even a new track gets measured.
Setting the target
Open Preferences (Ctrl+, from the keyboard) and go to the Mixing page. Check that auto-gain is switched on. The target loudness defaults to -12 LUFS and can be moved by up to 12 dB either way. A lower target leaves more headroom; a higher one makes everything louder but closer to the limiter.
Then load two tracks that you know differ a lot in volume and play them one after the other. They should now sit at much the same level. The channel faders and the VU meter on each channel show what is going on.
Each channel also has its own gain knob, with plus or minus 12 dB on top of auto-gain. Use it for small corrections by ear, for example a track that measures correctly but feels thin because it has little bass. Don't use it to undo auto-gain wholesale; if you find yourself doing that on every track, change the target instead.
Keeping the master clean
Matching tracks to each other is half the job. The other half is keeping the overall output from clipping. The master section has a volume control, a stereo meter and a limiter set at -0.3 dBFS, which shows a limiting warning when it is working. If you see that warning often, bring down the master volume or lower the auto-gain target a little. A limiter catches the odd peak well, but leaning on it all night flattens the sound.
EQ boosts add level too. The three band EQ can lift a band by up to 6 dB, so boosting the bass on two tracks during a blend can push the master into the limiter. Cutting the band you don't want is usually cleaner than boosting the one you do.
Recording a set at an even level
Levels matter even more when you record. Mix can record the master to MP3 or 16-bit WAV with Mix > Record the mix (Ctrl+R), and with auto-gain on, the recording keeps a steady volume from track to track, which makes it far more pleasant to listen back to.
When to switch it off
Some people prefer to set levels entirely by hand, perhaps because they have already levelled their files with another tool. In that case turn auto-gain off on the Mixing page and use the channel gain instead. For most home and party mixing, though, leaving it on with the default target is the simplest way to stop volume jumps between songs.
Mix by Zaweba is free software for Windows and works with the music files you already own, so you can try this on your own collection straight away.

