
How to add a dock or launcher bar to your Windows desktop
Scene by Zaweba's launcher bar takes dropped apps, folders, files and web addresses, and sits at the bottom, top, left, right or floating.
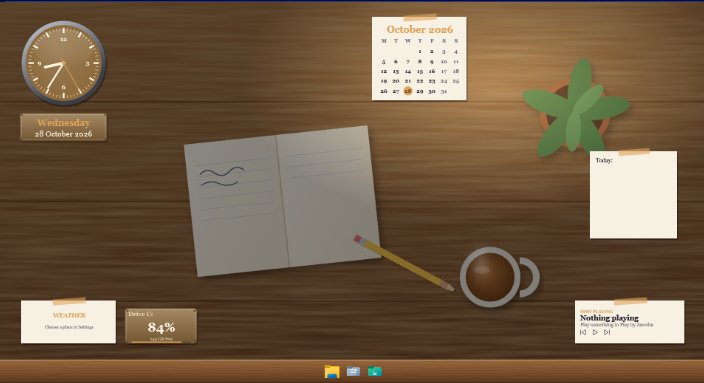
A launcher bar comes built into Scene by Zaweba, as a textured dock of shortcuts that sits on your desktop. Drag apps, folders, files, .url shortcuts or web addresses onto it, and choose whether it lives at the bottom, top, left or right of the screen, or floats. It comes with File Explorer, Documents and Downloads to start you off.
A dock is handy when the taskbar is busy with open windows and the Start menu is a few clicks too far. Scene's bar is just for the things you open most.
Filling the bar
Switch on any scene and the launcher bar appears with it. To add something, drag it from File Explorer, the desktop or a browser's address bar and drop it on the bar. Programs, folders, documents and web links all work. Icons are drawn at full resolution, so they look sharp even on a high-resolution screen.
Right-click an item to open it, move it, rename it or remove it. Renaming helps when two shortcuts have similar names, or when a web link would otherwise show a long address.
Your items follow you between scenes
The things on your bar belong to you rather than to a scene. Switch from Cockpit to Wooden desk and your shortcuts come too, dressed in the new scene's texture. You set the bar up once and keep it.
Placing it where it suits you
Each scene sets the bar's position and size, and you can change both in the editor for scenes of your own. Bottom is familiar if you've used a dock before. Left or right suits a wide monitor, where vertical space is precious. Top keeps it clear of the taskbar. Floating lets you put it exactly where you like.
By default the bar sits on the desktop under your windows, like Scene's widgets. If you'd rather it was always reachable, open Settings from the View menu or with Ctrl+, and tick Keep the launcher bar on top of other windows.
Choosing a texture
The bar's look comes from its texture, which Scene draws itself: log, desk, dashboard, chrome, holo, marble, panel or plain. A scene can also use its own image. The forest cabin scene uses the log texture, for instance, and the cockpit and car scenes suit dashboard or chrome.
When you build a scene in the editor, set the launcher texture along with the wallpaper, colours and font, then use Preview on desktop to see them together. A texture that matches the wallpaper makes the bar look like part of the room rather than something stuck on top.
How it sits with the taskbar
Scene never changes the Windows taskbar unless you ask it to. If you'd like the bar to be the main thing at the edge of the screen, Settings has an option to auto-hide the Windows taskbar while a scene is on. It uses the supported Windows setting and puts the taskbar back when the scene stops, even after a crash.
Keeping the dock useful
A dock earns its place when it's short. Eight or ten things you open every day is plenty. Folders are often more useful than individual files, since a project folder opens straight to everything inside it. Keep the rarely used things in the Start menu, and the bar stays quick to scan.

