
How to keep a folder shortcut bar on top of other windows
Tick Keep the launcher bar on top of other windows in Scene by Zaweba's Settings, and your folders and apps stay reachable over every window.
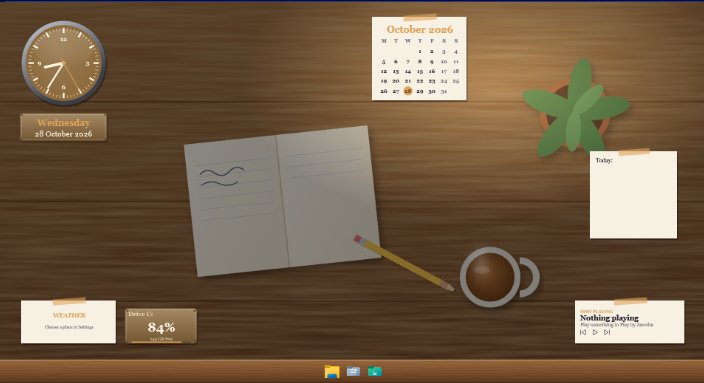
Keeping the bar in front takes one setting in Scene by Zaweba: open Settings and tick Keep the launcher bar on top of other windows. The launcher bar, with your folders, apps, files and web links, then stays in front of whatever you're working in, even a maximised window. Untick it and the bar goes back to sitting on the desktop beneath your windows.
Folders are what most people open again and again: the current project, Downloads, the shared drive. A bar of them that never gets buried saves a lot of digging through File Explorer.
Ticking the on top box
Settings is on the View menu, or press Ctrl+,. Tick the launcher option and close Settings. It works with whichever scene is on, because the bar is part of every scene.
Putting your folders on the bar
Drag folders from File Explorer and drop them on the launcher bar. It also takes apps, files, .url shortcuts and web addresses. Right-click any item to open, move, rename or remove it. The bar starts with File Explorer, Documents and Downloads, and everything you add belongs to you, so it stays when you switch scenes.
Rename long folder names to something short. "Invoices 2026" is quicker to read than a full path, and a short bar of clear names is the point of having one.
Choosing where it sits
The bar can sit at the bottom, top, left or right of the screen, or float. On top of other windows, it's worth choosing the edge carefully. Left or right often works well on a wide monitor, because most programs have spare room at the sides and the bar won't cover a toolbar or status line. Bottom can clash with the Windows taskbar, which is why some people pair it with taskbar auto-hide in Settings. For your own scenes, set the position and size in the editor.
Making it look right
Each scene gives the bar a texture: log, desk, dashboard, chrome, holo, marble, panel or plain, all drawn by Scene, or the scene's own image. Icons are drawn at full resolution. If the bar is going to sit over your work all day, a calmer texture such as panel or plain is easier on the eye than a busy one.
When on top isn't ideal
An always on top bar is great for frequent folder hopping, but it does take a strip of screen. If you work in full-screen programs, you may prefer to leave the setting off and reach the bar by showing the desktop. Try it for a day and see. Another option is to move the bar to a different edge. A narrow bar down the left side, with folders only, takes very little room and rarely covers anything important. If you change your mind about any of this, untick the setting and the bar drops back behind your windows straight away, with every item still in place. The setting applies to every scene, so you only need to decide once.
Whatever you choose, nothing in Windows is changed to do it. The bar is one of Scene's own windows, and switching the scene off removes it.

